Showing posts with label GP800. Show all posts

Sunday, 5 December 2010

Brake Pads - Replacing the organic pads with sintered ones


I've just replaced the rear brake pads again - after around 2,500 miles. This leads us to a valuable GP800 ownership lesson - on a bike with a 6,000 mile service interval.


I was cutting it fine (although not as badly as last time !). The pads would have been replaced at the recent 18,000 mile service but that would have pushed the job into a second day - and I wanted the bike back so I sourced and replaced them myself.

Although the more visible front calipers are the excellent Brembo "Serie Oro" jobs, the rear has to make do with the same Heng Tong caliper fitted to many of Piaggio's mopeds and small scooters.

This does have the advantage of ready availability (SFA353 if you're interested) but it also means that the common availability is limited to the lower grade organic pads which are fine for smaller bikes. These are what I fitted last time and to be fair, their ability to assist in bringing the 260kg behemoth down from very high speeds is not in question. If you read up on them, you'll also find plenty of recommendations based on the "feel" of the brakes. That's probably a fair point as I have locked up the rear of the GP800 far less frequently since fitting these pads. They also wear the disc itself far less.

Given the reputation of the Heng Tong caliper for seizing the retaining pins, a more frequent need to change pads (and re-apply copious quantities of Copaslip) could be seen as a positive benefit - but on December 5th, in our current weather conditions, that's not a positive feature in my book.

In fact, changing the pads is a remarkably straightforward job. I'm never entirely happy changing pads with the caliper hanging off the hydraulic line - especially if any force has to be applied (changing pads on the Brembo calipers fitted to the K75 is a much simpler proposition altogether) but once the retaining pins are unscrewed, the new pads just drop in - and at least small pistons are much easier to push back in to refit the caliper over the disc.

The new pads are EBC HH sintered pads. Lets hope that they last significantly longer - but not at a cost in increased "grabiness". The other thing that might encourage me to stick to the softer pads will be if I see any signs of increasing disc wear.

Friday, 30 July 2010

Gadgets and the GP800 - the "Fat Gecko" Camera Mount

One of the things I've always loved is the old "London to Brighton in 4 minutes" film made for the BBC many years ago - you can find it on You Tube if you just search "London Brighton" - there are a number of versions.

I loved the idea of doing a similar thing with my bike journey home from Battersea to Stanmore. I already had the camera, the excellent Kodak Zi-8 and it's probably worth a few lines about why I like this camera so much.

Although there are plenty of Hi-Def cameras around, like many people, I can't really exploit the technology. I have an HD TV but my computer cannot cope with editing the files, and for all practical purposes, the best output medium for finished movies is the DVD (at least until Blu Ray burners drop to a more reasonable price). The Zi-8 gives me the future proofing of full 1920x1080 HD with the more user friendly option of a WVG (widescreen 848x480) which has the added benefit of taking up much less storage space on a memory card. It's natively better than DVD resolution and more than enough for any online application such as You Tube. There are plenty of inexpensive cameras that record in VGA, but very few of them offer a true widescreen format. The ZI8 (and others of it's ilk) has two further advantages which might be seen as negative points but are actually significant benefits.

Firstly, it has a fixed focal length lens (although digital zoom is available). This means that there is not an expensive and fragile mechanism to move the lens - it makes the camera compact, and most of all much tougher than the cheaper cameras with optical zoom. You only have to look at the number of "broken - for spares or repair" digicams and camcorders for sale on eBay to see
how fragile these things are.

Secondly, it has a fixed focus lens. On a still camera this is obviously a very bad thing, the small aperture needed to keep a substantial depth of field translates into poor light gathering ability. On an inxpensive camcorder, it's an absolute boon. Again, There's no fragile focussing mechanism to break and secondly, apart from a close up switch, the device is "panfocus" so you don't get the constant focus hunting that plagues other cheap camcorders.

So much for "a few lines" !

So, we have the right camera for the job, all we need now is a way to attach it to the bike. I had toyed with the idea of using the very fine RAM mounts but they are not readily available except by mail order and you need to construct a mount from a selection of brackets, bike specific fittings and camera plates so I'd put the whole problem into the too hard/expensive box and left it at that. However, as we approached our Summer holiday, I wanted a solution for the car to enable me to add backgound to my holiday DVD by adding clips of entering a Channel Tunnel Shuttle train, driving through Paris, crossing the Millau viaduct etc. A quick search found the "Fat Gecko Mini" from Delkin and a number of reviews praise it for being a sturdy well made bit of kit.

Delkin Fat Gecko Mini

Although it can be found for under £25 online if you search around, the going rate seems to be £28-£30. Whats more, Jacobs Photo in the Kings Road has one in stock so I didn't mind paying the top end of that range to avoid postage costs and to have it in my hot sticky mits straight away.

It certainly is a high quality bit of kit - and comes with a short 3" extension making it flexible enough for most uses and it certainly grips like a limpet (Gecko) on smooth surfaces, even the slight curve on GP800's Givi screen. The best fit was achieved by putting it over the rev counter on the GP800 but it was difficult to remove as you couldn't reach the little "tag" that releases the suction as the instruments are quite recessed. I rode with it fitted without a camera attached and it certainly hangs on quite happily despite the poor state of London's roads.

As you can see from the pictures, when I fitted the Zi-8, I attached its lanyard to the mirror as well as a second lanyard between the Fat Gecko and the mirror. When riding, especially on poor surfaces there is a bit of "bounce" from the screen (even in its lowest position) and of course when you come to a stop, the front forks dive a bit but it doesn't really notice in the final video. When you first ride you tend to look at it but it soon becomes easy to ignore as you concentrate on the road and traffic conditions !

Does it work - yes it does - click below to see the result


(it's a pity that the video has to be compressed for You Tube - the original quality is first rate)

It's pretty good in the car as well. The Mazda 5 has a fairly steeply raked windscreen but using the 3" extension allows the camera to be mounted on the small quarter light window just in front the door mirror. The camera then sits neatly in the corner where it doesn't obstruct the drivers eye-line (we don't even have the Say Nav mounted on the windscreen - we use a Brodit mount which brings it down by the radio - which has the added benefit of reducing glare on the screen). On holiday I'll mount it on the passenger side and my wife will start and stop the recording.


Saturday, 17 July 2010

Electric Windows - on a bike ?

There a a few features of the GP800 that I thought were a bit "gimmicky" when I bought the bike. The obvious one is the handbrake - completely pointless as far as I'm concerned as I always use the centre-stand (in fact, I consider the lack of a centre-stand on many modern bikes an absolute dealbreaker for me but that's another story). To be fair, owners who don't habitually use the centre-stand may find it useful when parking the bike on a hill. Without the ability to leave it in gear, 262kg of expensive Italian metal and plastic could very easily take a tumble.

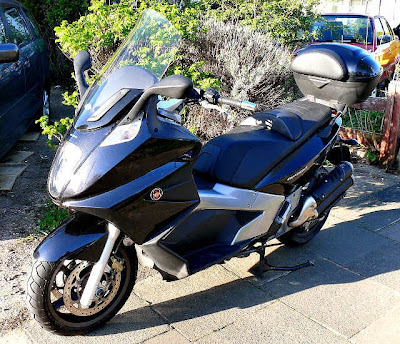
The other apparently unnecessary feature is the electric screen - but in the last few weeks I've had cause to be very glad it's there. The benefit is certainly marginal with the completely useless standard screen but with the Givi it's an absolute boon.

I generally ride with the Givi screen in it's highest position for maximum protection from the wind- that's why I fitted it after all. It works well and has the added benefit of improving the looks of the already beautiful GP800. In the last few weeks, it's been pretty hot and muggy in London and even wearing an "air" suit, progress in the London rush hour has been stifling. A quick flick on the switch and the difference is immediately noticeable - in fact with the Givi the difference between "up" and "down" is far more marked than with the standard screen.

It even works at higher speeds - drop the screen while filtering up to the toll booths on the M25 at the Dartford Crossing and even if you forget to raise it immediately, the mechanism copes with raising the screen at 70 (ish) mph.

A genuinely useful feature after all :-)

Chain oilers again – what goes around……..

If you look at the “Tutoro” tag, you’ll find the old post where I fitted the chain oiler in the first place. As an inveterate “fiddler” I wanted to improve it somehow – and I have always been drawn to the other inexpensive chainoiler, the Loobman. As it is sub £20 I bought a Loobman anyway. As many reviews will confirm, the delivery method to the chain is a little “Heath Robinson” but the way the bottle delivers a measured amount of oil is quite neat. The Tutoro reservoir was fitted quite high on the bike so I fitted the Loobman bottle low down behind the passenger footpeg giving me a much shorter “run” of tubing. What’s more, as the Tutoro delivery system was working fine I left it in place and ended up with a hybrid system of Loobman reservoir and Tutoro pipework.


This was my working system for a month or so and it was fine – at least until the bottle fell off to be lost forever somewhere between Dunstable and Newbury. Rather than returning to the Tutoro reservoir, I decided to give up on chain oilers and simply reverted to spraying chain lube at intervals. I had plenty of the white chain wax from before I'd fitted the Tutoro so that was sprayed liberally over the chain

One of the things that has always plagued me with my GP800 has been “noises off”. However sweet the engine is, I have always suffered from driveline noises of one kind or another. There was the dreaded “Strangled Sealion” noise ( I credit the X9 Owners Club for the phrase – I note a post on Modern Vespa forum that failed to do so !) which in my case was caused by a loose clutch nut and there is also chain noises which have been the bane of my life.

Soon after the events above, I noticed more driveline noises. It was a graunchy rotating noise and quite frankly sounded expensive and definitely mechanical – like a bearing about to give up. I posted on a thread on the GP800 sub forum at X9 Owners Club and found that the final drive pinion oil level may not have been topped up properly at service (thanks JimC). A quick removal of the passenger footrest and a squirt of gear oil from a childs medicine syringe cured that one (the level was a little low) but the graunchy grind was still present.

In a fit of desperation, I slackened the chain (way more than recommended) to see if reducing the strain on the driveline made any difference to the noise – surprisingly it did, but not by a lot. By now I was resigned to taking it somewhere with a blank cheque but as a final thought, I completely cleaned the chain removing all the white chain wax and manually lubricated the chain with Scottoiler oil that I used in the Loobman. This time I re-adjusted the chain correctly to spec.

Result – silence J

Well almost – it still clanks a bit when being pushed backwards but the horrible mechanical grating has gone. Even now, a few days later, I struggle to comprehend how something as basically simple as a stiff chain could make such a terminal sounding noise. I’m guessing that over time, the chain has stretched slightly unevenly and this will be cured by the (scarily expensive) chain replacement at the next service (18,000 miles).

Either way, I should have listened to myself by re-reading my earlier post (18th Feb 2009) when I recommended against wax type chain lube – So here it is again – for me as much as any other GP800 owners out there

DON’T USE WAX TYPE CHAIN LUBE ON A GP800

Of course, YMMV, FWIW, IMHO, IANAL, ROFL, ETC and I may not have helped matters by either using too much of the white chain wax, or layering it up over time by not cleaning off the old wax before re-applying- but the advice above stands.


So, it's back to the Tutoro reservoir. fitted lower down where the Loobman bottle lived - which gives a much shorter tube run an d reduces the headache of priming. Even if you allow the oil to run out, the total amount of oil in the system is much less and just refilling the reservoir self-primes quite happily.

Listening to a GP800 provides the best way of knowing when it’s “right and tight”. If you close the throttle from about 35-40mph, as the speed falls away, between 30mph and 20mph the engine becomes almost inaudible and the only noise you can hear sounds like a coasting London Underground (tube) train. Of course if you’re not a Londoner that will be meaningless to you – but the noise is quite distinct, a comforting “whirring” sound.

As an aside, the noises from the rear were so severe that they masked another new noise that I’m ashamed to say I missed. I had always been surprised by the fact that my rear pads had never been replaced as I tend to favour the rear brake (despite it being the naturally clutch side for me). I had even unequally adjusted the lever reach to try to force me to split my braking in favour of the front brakes.

The pads have been replaced now !


Although I was concerned at the possibility that the allen keyed pins might have seized necessitating calliper replacement (eek – thanks again JimC) the task was remarkably straightforward – especially since I was suffering from “Housemaids Knee” at the time. I guess that’s testament to the original Thomsons quality of PDI which involved a great deal of dismantling and Copaslip before I took delivery. Not quite “BMW Brembo” simples but no real grief. The only problem was that the hole in the inner pad for the pin to slide through was slightly too small (probably by the thickness of its paint) requiring a simple ream out by hand with a drill bit.

Whew, that’s a long entry. I really must get round to updating this blog more often.

Sunday, 31 January 2010

GP800 - Seat Lowering

Although I am a shade under 6 feet tall, I am somewhat short in the leg and long in the body. Combine this with the width of the GP800's seat, and I have often been left with one leg dangling when "paddling" in heavy traffic.
I have previously had a custom seat made for my R1100RS by Melvin Hunter and he was my first (and only) port of call for the GP800.


The R1100RS seat foam was simply "dished" slightly and a "gelastic" pad inserted - and a new custom cover was made. This time I was looking for as much lowering AND narrowing as possible - and the narrowing was more critical than the height.

One of the problems of having a seat conversion is the small matter of despatch. Not only do you have to pack a large seat (suitably protected), you have to get it to a post office and pay Postman Pat an inordinate amount of money to take it to Coventry. Then of course, you have to pay Melvin a similar amount of money to send back to you.

Something of a "result" presented itself to me when I realised how close to the NEC that Melvin was based - Once I knew I was attending this year's Motorcycle Expo (trade show) I arranged to drop the seat off on my way up - and Melvin agreed to provide a same day service and I collected the seat the same afternoon.

This timescale prevented the fabrication of a completely custom seat and cover like the R1100RS - but it did allow for a comprehensive re-shaping and "pulling" down of the existing cover together with the fitment of a "Gelastic" pad to provide additional comfort given the amount of padding which was removed.

These days, Melvin has handed over the fabrication to his son Ross and I am please to say that he has obviously handed down his skills efficiently as the job was clearly a top quality piece of craftsmanship. When I collected the seat, I did have an initial reaction of disappointment as it didn't seem as if anything had changed - but feeling the seat contours made me realise that the sides had been gently "scalloped" and the seat lowered very neatly and subtly.

Riding the bike with the new seat is excellent - although it doesn't seem much narrower, the combination of scalloped sides and reduced height means that I can have both feet flat on the floor - I am certain that once I'm back on the daily commute this will be a godsend in really heavy traffic.

It was only when taking the "after" picture and montaging it together with the "before" that I realised just what a comprehensive piece of work had been carried out. You can click on the image to see a larger version but the points to note are the significant reductions in "meat" above the solid plastic nose section as well as above the seam that follows the line of the riders leg. The narrowing is evidenced by the lack of a "ridge" along the lower edge of the seat base (much more obvious in the "before" picture by the shadow below).

Without having to pay for shipping, the cost was £95 including the gelastic pad. Worth it ? - I think so. Highly Recommended

You can find Ross and Melvin at http://www.motorbike-seats.co.uk and their website has an image gallery of some of their work.

Monday, 19 October 2009

GP800 Speedo - The Final Solution

.

This time the solution IS definitely final.

Having identified that all the last update provided was some legible MPH markings, without addressing the speeometer innacuracy isssue, I decided to do the job properly.

I cleaned all the markings from the dial - easy enough with a spot of nail varnish remover on a cotton bud - then went out with the trusty RoadPilot MicroGo. I marked the speedo at the significant "GPS correct" MPH speeds then cut out and applied the speed markings from one of the spare MPH stickers from the original set.

Here's the result - neat enough but more importantly GPS correct all round.

Is this the perfect solution - in a word no, but it is final as far as I'm concerned. The downside is that you can't clearly see the markings in the dark - only now evident as the nights are fair drawing in (and it's also dark in the morning when I head in to work) but this is countered by the fact that the Roadpilot's illuminated readout is hightly legible in the dark.

.

Sunday, 27 September 2009

GP800 Rear Sprocket Problem (loose)

So, the cause of my clanking is confirmed as a loose sprocket – as it was when I had the tyres fitted. One of the bolts had sheared off at the head. This time it was worse and the bolts simply didn’t want to tighten up in situ.

I removed the rear wheel (a relatively straightforward job) with the intention of removing and refitting the sprocket (replacing the sprocket if the holes had elongated in any way).

This is where the fun started. Despite being loose enough to allow a degree of rotational movement in the sprocket, the bolts were simply too difficult to turn in either direction. Remembering that the are already weakened by the action of the rotating sprocket, I applied localised heat and very gentle (but maximum) force with the result that a further three sheared to go with the one that had already done so.

Only one came out cleanly. This revealed the cause of the problem as well as a paradox. The entire thread had been liberally coated with enough threadlock/superglue to keep the propeller on the QE2. I still can’t figure out how they became loose in the first place. This was of course compounded by the natural action of a steel bolt to seize in an aluminium thread.

As the wheel was already out of the bike, I lifted the carrier off the cush rubbers and headed for my mate in Potters Bar who is equipped with a bench, a sturdy vice and a set of “Easy-Outs”. Even with further application of maximum heat, and being drilled clean through these bolts were not coming out – with the inevitable result that the Easy Out snapped.

The carrier then went to CAM Engineering in Potters Bar http://www.camauto.com/cameng.html – it would have been fairly straightforward for them to drill out the sheared bolts – but the broken Easy Out added another dimension to the problem and increased the estimated cost to “up to” £75.

I checked with http://www.gileraspares.co.uk/ online and a new carrier assembly is £74 – but delivery time is “up to” a month (there’s that “up to” again !)

So, CAM Engineering sorted the original carrier – after removing the broken bolts and repairing the damage, the carrier was drilled right through to allow slightly longer bolts with Nyloc nuts to secure the sprocket - there’s plenty of room behind the sprocket so I can’t understand why it wasn’t made that way in the first place.

If there’s a small crumb of comfort in all this, there’s absolutely no discernable wear in the original sprocket – even after 10,000 miles.
Of course in hindsight it might have been better to have taken it in under warranty with a "loose sprocket" but any workshop would have faced the same problems - it would have been their problem not mine and I might have been without the bike even longer (let alone the inconvenience of taking it there in the first place). This way although it cost money I was back on the road more quickly. At the end of the day the fault lies with Piaggio for supergluing the bloody bolts in the first place.

Saturday, 20 June 2009

MPH Speedo - again !

.
The final speedo solution - probably not.

My need for a clear legible and accurate speedometer for the GP8000 is starting to turn into an obsession. I found these on eBay and thought I'd give them a try.
http://cgi.ebay.co.uk/ws/eBayISAPI.dll?ViewItem&item=300322400500
They arrived promptly and certainly seemed neatly made. 100mm is the correct size for the GP800 so after a little bit of trimming, I offered it up to the Speedo. This is where we found snag #1.

The GP800 has a 100mmm diameter speedometer but the cowling makes it fairly deeply recessed - and the cowling encroaches on the speedo by a couple of mm all round. I didn't think that trimming by that amount would be a particularly neat solution so I decided to (gulp) remove the speedo.

This involves a considerable amount of bodywork removal. If you've ever wondered what a GP800 looks like naked, here it is in all its glory. Dismantling to this degree is not difficult but it is fairly time consuming. You will definitely need the workshop manual(thanks Jim) to find all the various screws and the correct order to remove them. Even then there are two screws not mentioned in the instructions (although they are fairly obvious). I can also pretty much guarantee that at least one of the trim clips will fall into the void somewhere. Once the body panels are removed, taking the speedo out is a little fiddly as the electric screen mechanism gets in the way. A degee of leverage on the "dashboard"helps.

With the speedo removed the job is now looking much easier. I did consider stripping down the unit itself in order to scan the dial face and make a proper job of it - but to be honest it looked a little scary - and I'm sure that water ingress would be the inevitable result. Perhaps when the bike is out of warranty in another years time I might give it a go.

Fitting the sticker is very straightforward. I debated trying to set the numbers correctly for "real speed" as opposed to indicated speed but I decided that would potentially compound any errors and anyway the GP800's speedo gets progressively more innacurate as the speed rises so it would ony be correct at one speed. I decided to stick to marked speeds as I have the GPS speedo for accuracy anyway so I just lined up the 0 position. Once fitted I was left with some sticky residue from the tape I had used to hold it in place while lining it up. I tried simple cleaning but here is where I made my mistake. When cleaning things like this, they always say "try a little on a small area first". I can see why ! If you're planning to do this, remember that nail varnish remover will take off ink from speedometer conversion stickers. You can see the evidence of this (and my attempts to rectify the problem) at the 100 and 110 mph positions - thanks to "write all" CD pens.

In use it's fine - it's aesthetically OK but obviously not matched to the GP800's instruments. Most importantly it gives you the "quick glance" indication of speed so essential on todays roads. The degree of error in the GP's speedo means that an indicated 30mph is about 29, 40 is about 36-37, 50 is about 44-45 and by the time you get to 70 your actual speed is bareley over 60 - but that's the GP800's problem not the speedo sticker.

In all, recomended to all GP800 owners in the UK.
.
.

Saturday, 25 April 2009

GP800 - GPS Speedometer

I have said it often enough - but it stands another repeat, the single worst feature of the GP800 is its speedometer. It is illegible in MPH to any normal human. The numbers are too small and it really should not be necessary on a £6,500 bike to paint lines at 30mph and 50mph to ensure that you are within the speed limit of the multiplicity of "safety" cameras that blight this land. It's not as if Piaggio are a small importer, they are the biggest PTW manufacturer in Europe and are consistently the number four seller of bikes in the UK. The GP800 is their flagship product - if they can't be bothered to give it and accurately marked MPH speedo, they could have simply fitted a digital one. To add insult to injury, the accuracy of the speedo is appalling. On a journey where I was using the Nokia GPS Sportstracker feature on my mobile phone, I may have exceeded the speed limit by a small margin - the GPS tracklog showed I was travelling far slower than I thought I was.


I had looked at replacing the speedo face - there's a place in Germany that will make the first one free but I couldn't face the amount of dismantling required to get to the speedo (or the loss of use of the bike while it was done) so I just kept moaning. There are also plenty of overlays that go above the instrument glass but I think that's too "cheap" a solution - I may change my mind as the bike gets older (and/or this country's persecution of speed gets any greater)

I had pretty much given up on a good solution when I happened to notice an "Indic8tor" on eBay. A little reseach showed that there were a number of these GPS speed camera detectors on the market (Indic8tor, Talex, Road Pilot etc - I won't link to them all, if you've found this blog you can probably use Google all by yourself :-)) . They are perfectly legal in the UK as they do not actually "detect" the cameras (Laser based camera detecters ARE illegal), they simply use a database of locations just like a normal SatNav.


What's more (a bonus for the dedicated cheapskate) these things start at around £50 complete with their first camera database subscription - and once that is out of date, they cost £50 per year to keep them updated. Once they are "Database Expired", they appear cheaply on eBay.

The Talex and Indic8tor looked good and their LED displays looked highly legible but a quick trip to Halfords revealed that their size might make fitting diffcult on the GP800. The Roadpilot MicroGO did however look just the ticket.


A few days carefully watching on eBay and I picked one up for just £18 :-).


In a nutshell it's an excellent (if not quite perfect) solution. It fits neatly on the top of the dash and it's connected to a standard cigarette lighter socket fitted under the dash next to the battery (wired to the fusebox). The device has no internal battery at all so it is only powered up when connected.


The normal suction cup mount is screwed down and it's a pretty sturdy fit. It doesn't affect the movement of the electric screen in any way and the power lead drops down throught the screen mount slot.


when removed, the mount itself keeps the lead in place.

As soon as the bike is fired up, it switches itself on and starts searching for satellites. It seems slower to get a "fix" than my Garmin Nuvi 360 in the car but once it does lock on it seems to hold the signal perfectly well. As with all GPS devices, if you can't wait for the fix and start moving, the fix takes even longer. I tend to do this and it cakes up to 5 minutes to fix - I live with this - it's not as if it's my only speedo, its a supplementary device anyway. once it has achieved a fix it immediately tells you that the database has expired but you simply press the single control button and it goes to the speed display.


When moving, it does exactly what is says on the tin - it dispalys the speed in mph pretty clearly - and way better than the OE analogue speedometer. It catches up quickly with rapid acceleration (at least as good as a Citroen car with digital speedo) and slows down almost as fast.

It doesn't seem to vibrate too much (doesn't affect clarity) and the only effect of the vibtration is to caust the flip out antenna at the back to drop down. When this happens, the number of satelittes "seen" reduces but the lock is maintained. I just flick it back up when I notice it - but I may employ a high-tech piece of blu-tack in future.


There is a problem with visibility in bright sunlight but I thing that's a result of the possitioning rahter than a fault with the unit. Having said that, it could do with a brighter backlight. The manual claims that it has a myriad of backlight colours to match - and these can be endlessly cycled through in the settings menu but to be honest (as the pictures show) it always seems to look like "LCD green/grey" whatever the setting. It is much better in the dark where it does show a sort of washed out version of the orange backlighting of the GP800's centre LCD panel. I may look to ocnstruct a smple "hood" at some time in the future if the summer proves to be a good one.


Of course it does also work as a speed camera detector. Even with an outdated database, it still warns of longstanding cameras (of course I am fully aware of their location anyway ) and if you wanted one of these for its stated purpose I'd say it does a good job. The screen dispalys both the speed limit and your speed and the diplay is flashing if you are over the limit. It does feature an audible warning which I suppose would be useful in a car but I have this switched off.

All in all, I'm very pleased.

.

Sunday, 5 April 2009

GP800 - Givi Screen

A little while ago I removed the "Heath Robinson" double screen from the GP - aesthetcially I had started to hate it. I was planning to live with the shortcomings of the standard screen during the "Credit Crunch" - but a blustery trip on the M4 combined with driving past a Givi dealer led me to an impulse buy.

The Givi D352ST is a very nice pice of kit. Fitting was a breeze all the holes lined up correctly and it sits perfectly on the bike.
A quick trip up the M1 proved that it is as effective as it is good looking. In the fully upright position it's a little noisy but the buffeting that comes with the standard screen is replaced by a little ripple on the sleeves of the upper arms. On the way back I lowered it and it was much better quieter - but without the windblast that the low position gives you with the standard screen.

£77.74 "all in" from HGB in Ruislip (not a stock item but delivered from Givi in one day) http://www.hgbmotorcycles.co.uk/


Monday, 23 March 2009

GP800 - Tyre Replacement

The Pirelli Diablos have been on for a few hunded miles now and I'm very impressed. Much better handling in town and no issues with high speed stability either. As long as they wear reasonably evenly, and last at least 5,000 miles they'll do for me.

The OE Michelin Pilot Sport SCs managed 6,700 miles and the rear was still comfortably legal when when the tyres were changed. It was however comprehesively squared off. The front was just coming up to the wear bars and had lost profile dramatically - Google "cupping" or "scalloping" to see the effect. I'm sure the front started with less tread depth because the only other bike that I've owned that wore front tyres as fast as rears was the R1100RS and that's down to the Telelever front end.

Another contributory factor may be the fact that I'd increased the rear shock preload to stop the bike wallowing and that may have "loaded" the front too much. I don't think it's unreasonable that a bike of this calibre should have adjustable damping - jacking up the preload to stiffen up the bike is not really the answer - higher levels of damping would properly slow the rate of movement of the shock - rather than just reducing its travel.
.

Monday, 9 March 2009

GP800 - Chain Noise

This weekend the OE fit Michelin Pilot Sport SCs were replaced by a pair of Pirelli Diablos – more on that story later. While at Essential Rubber in Hackney, the guys there noticed that the rear sprocket was not tight against the carrier. This answers my question from an earlier post, here was the true cause of the noise that I had incorrectly diagnosed as a chain noise (at least I could tell it was final drive related).

The risk in these circumstances is that the holes in the sprocket will elongate as well as wearing the bolts themselves – to the point that they will eventually snap. Further investigation and comparison with a new sprocket revealed that the holes had not elongated and that the bolts were not damaged. A quick application of a spanner to the bolts has completely cured the noise.

I’ll be keeping an eye on that one !

Saturday, 21 February 2009

GP800 - The TUTORO Chain Oiler

The TUTORO arrived in two days, neatly packed and looking like a first rate piece of kit (as always, click on the pictures for a larger version).

It's a very simple affair, but the package includes plenty of cable ties, small rubber blocks to go behind the reservoir, a couple of sticky pads and a syringe to make filling the reservoir easier. The instructions are clear and well written in proper English.

After removing the passenger footrest bracket, the trim panel and of course the chainguard I could get a good idea of how to mount the device. I had originally planned to mount the reservoir behind the number plate but quickly realised that there were two flaws with that plan. Firstly, although it would have been a neat solution, refilling the reservoir would have been tricky even with a syringe and secondly, the delivery tube would have had to drop vertically then curve up again significantly to run it forward before dropping down towards the swinging arm.

The obvious place was on the silver trim panel that runs down to the rear indicator and number plate mount and simply unscrewing this panel allowed the cable ties to be run behind it. It looks quite good but I may look to find an even neater solution.

From here the delivery tube ducks behind the panel and runs forward under the fuel tank. There is an inner rear mudguard and the pipe tucks behind that before looping round the swinging arm pivot. It drops below the swinging arm and is cable tied to the chainguard bracket to route it backwards towards the rear sprocket.

I wondered about whether it was better to drop the oil onto the top of the chain running forwards to the gearbox sprocket or on the lower (inner) edge of the chain and settled for the latter - my reasoning is that the greater diameter of the rear sprocket should help to squeeze the oil out and spread it more efficiently around the chain.

The cable ties make it easy to position the delivery tube and the final narrow outlet has a slight curve to it. By simply rotating the delivery tube before tightening the cable ties you can ensure that the drops of oil fall exactly where you want them.

Filling the reservoir was simplicity itself. The instructions say that you need to prime the delivery tube first and that this might take some time. If fact it would have taken about a week even with the "tap" fully open! I removed the delivery tube from the reservoir and primed it directly with the syringe then reconnected it to the reservoir. I've used chainsaw oil as it's designed to resist flinging off (£6 for a litre in B & Q) but it's thin enough not to "clag up" the chain.

Once it was all set up, I opened up the tap two full turns and watched for the drip. Exactly as described, a small droplet formed on the end of the delivery tube and dropped perfectly onto the chain.

For now, I've adjusted it to deliver a drop every 10 seconds and I will see how that lasts on my journey to work (about 35 mins). As it's a fully manual system, my plan is to judge the delivery so that the TUTORO empties itself in one journey. Then if I forget to turn it off (quite likely !) it will not continue to drip over the car park floor (or tyre) once I get to work. Of course if that means a labourious re-priming of the delivery tube each time, I may just have to get into the habit of turning it off as part of my locking up routine.

Before refitting the chainguard, I readjusted the chain and set it back to the correct "factory" deflection as I may have to accept that Piaggio do know what they are doing there - having reduced the slack I found that the chain was even noisier after a trip to Milton Keynes.

Here's the final look with the chainguard refitted. It looks pretty neat and apart from the reservoir, the only visible sign is just at the leading edge of the chainguard. I'm very pleased so far, fitting was straightforward, settign up easy (once I had primed the tube) and it appears to do exactly what it is supposed to do - for under £15

Wednesday, 18 February 2009

GP800 - Chains again

As the chain final drive is one of the defining features of the GP800, it generates a lot of interest.
Recently I've noticed a clanking/slapping/rattling from the rear of the bike at slow speed. I reckon that this is a combination of two things.
  1. The "by the book" chain adjustment is too slack - I've mentioned this in an earlier post.

  2. Thick "wax type" chain lube.

I am unfamiliar with modern chaincare methods and I was told that chain lube comes in two basic types - thin and penetrating (but not long lasting) or thick and clingy (which requires less rider effort). As a naturally lazy person I have been opting for the latter - but I think this compunds the problem and my conclusion is emprical rather than reasoned.

By thoroughly cleaning the chain with WD40 (Google "WD40 Chain" to get about a million hits on the subject - it's hotly debated) and then lubricating with thin oil, the noises go away completely. Of course the problem is that this only works for a day or so - and constant maintenance is not my idea of fun.

This means that a chain oiler has to feature in my future.

Initially, I looked into the Scottoiler but it's expensive and requires a vacuum take off from somewhere in the induction system. I've had some recent issues with ECU mapping and cutting out so that's not a route I fancy. I had also discovered the Loobman – a seriously “bottom end” piece of kit. £18 “all in” - and some seem to rate it quite highly. It does however appear a bit “Heath Robinson” and a trawl around a number of forums seemed to suggest that it can be fiddly to get it set up right.

http://www.chainoiler.co.uk/

Never one give up unitl I’ve wasted at least a couple of days trawling the internet, I found some other options. Accumen make an electronic system but it’s over £100. It claims to be clever, altering the flow rate relative to speed, but £100 buys a lot of cans of chain lube.

http://www.acumen-electronics.co.uk/category/Chain_Lubrication/CL10_Chain_Oilers___Remote_Kits

There’s also the “Pro-Oiler” and the “Cameleon” as well as the Motrax “lubetronic”. I had just about decided to risk £18 on the Loobman and live with having to play about a bit when I discovered the TUTORO at the very similarly URL’d

http://www.chainoiler.org.uk

This one’s even cheaper at £14.99 “all in” and doesn’t even purport to have any form of automation. It’s simply a neat(ish) manual drip solution. The advantage of this one is that you just set/judge the flow rate for your normal journey and only fill the reservoir accordingly. I won’t remember to fill it/use it as often as I should, but I reckon for £15 it’s a better option than infrequent spraying with gloop. The clincher for purchase is that when I e-mailed them to ask them to “justify themselves” against the Loobman, they responded within 2 hours with a proper personal reply, not a standard document – and I’m all for supporting small cottage industries in this country.

Further news when it's fitted.


Wednesday, 14 January 2009

GP800 - Mirrors

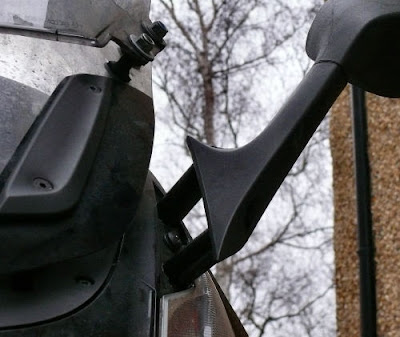
Conventional wisdom (mine) says that there are only two things wrong with the GP800 ( I don't count "lack of luggage space" as that's simply a design restriction caused by having half of a V-twin sticking up under the seat) They are they speedo and the mirrors. Now, for some time, I've felt that the problem with the mirrors is not their size but their positioning - for me at least either the bars need narrowing or the mirrors need moving up and out. I bought some longer screws today - and was about to start carving a block of wood when I noticed that the two screws are not in line.

There would be enough grief making a 2" thick piece of wood fit the (slightly) recessed piece of the fairing, plus there's the countersinking to fit the fairing mounting screw (shown) and the "plugs" on the underside of the mirrors to take into account, and now there was the need to line up two non parallel holes - as you can guess, I was losing interest now.

It looked like a Homebase visit was required. A Ferarri F430esque solution using the copper pipe as a spacer - I thought I might need to run some nuts up the threads inside the pipe to help centre the screws.

I reckoned with washers at the ends it would do the job (but not necessarily aesthetically) and I'd know if it worked well enough to justify working on a prettier solution. With my cobbled up double screen as well, my GP's going to start to look quite eccentric

It turned out not to be too challenging. I used plastic overflow pipe rather than copper pipe (£1.50 for a handfull of metres) and to be honest it doesn't look as bad as I'd feared.

I do have some "previous" with mirror mods http://www.zen113982.zen.co.uk/mysite/mods.html#mirror and the problem is usually vibration and blurring. The GP's new mounts seem perfectly rigid, they definitely work - a significant improvement in my rearward view. No vibration or blurring at all - I reckon that the skewed screws might be providing some kind of torsion that aids rigidity. I'm so pleased that I might seek out even longer screws. I reckon another inch would be enought for total rearward vision. Only once so far have I "lost" a gap because of the mirrors - extendending them further might increase that but for the sake of a couple of quid (and easy reversion anyway) I'll probably give it a go.

Tuesday, 2 December 2008

GP800 - Headlight Bulb

Lately I've had my first (very minor) problems with the GP.

The first one was the failure of the headlight bulb. I thought it was a bit dim pulling out of my car park at work and pulling up behind a white van in traffic revealed the cause. Fortunately, the high beam was not set too high (possible as the supension is set towards "hard") and I could get away with riding on high.

Replacing the bulb was pretty straigtforward, TX20 for the small screws, large cross head for the bracket screws. I was foxed for a second by the fact that there are no locating lugs on the headlamp shell then I remembered that the H7 is low beam only so is not directional in any way. The only slight issue was the rubber "gasket" that fits on the back of the centre panel which kept slipping down while trying to refit the panel.

Halfords sell about a million different types of headlamp bulb offering a selection of increased light output for your 55W. I recal some objective test we carried out at the AA years ago on "clever" headlight bulbs which objectively concluded that it was all bollocks - apart from the bigger profit, the only real difference was a perception of brighter light.I believe that subsequent research (by proper professionals !) has concluded that there is some benefit - but I took the old fashioned approach and fitted a 80W bulb (rather than the 100w jobs of yore). I will of course only be using the GP800 off road in future :-)

I'll keep an eye on the plastic cover for signs of melting but I suspect that
  • It's unlikely to be a problem in these temperatures (2 degrees this morning)
  • There's a fair distance between the bulb and the plastic cover.

.

Tuesday, 1 July 2008

GP800 - Chain Adjustment

I guess that a lot of GP800 owners (and potential owners) will be upgrading from another scooter. Others like me will be BMW riders looking for an alternative. Few are likely to be defecting from ownership of an R1, 'Blade or GSX-R or even a Fazer, Bandit or Hornet.

The upshot of this is that there will be many GP800 owners faced with something they have not had to consider for a long time - if at all, the adjustment of the final drive chain.

The rear axle has a 28mm nut on one side and the other side has a hex soxcket to take an allen key to lock it to prevent it rotating when undoing the nut. Unfortunately, this socket is 22mm so you are unlikely to have a big enough allen key to do the job. Fortunatley, HPS come to the rescue with a simple socket adaptor. Until I bought the adaptor, I could only hold the axle with a box spanner - although it did the job it did not provide a particularly good fit in the socket. http://www.bikehps.com/acatalog/BikeHPS_OnlineStore_Workshop_Tools_97.html came to the rescue with an adaptor. I also took the opportunity to buy a new 28mm scoket and a 22mm socket for use with the adaptor. http://www.tooled-up.com/ supplied these very swiftly and efficiently at a good price.

According to the book, you check and adjust the chain with the bike on the centrestand. You first remove the chainguard and you are looking for a chain deflection of 38mm (+/- 2mm) to a specified point on the swinging arm.

This does seem to fly in the face of conventional wisdom but I guess the guys at Piaggio must know what they're doing as it seems about right - I have to say that I think they're slightly on the slack side but their calculations seem to allow for the take up of the suspension quite well.

Incidentally, if anyone's wondering about chain life, it slackened phenomenally in the first 2,000 miles and has barely needed more than a tweak since. That was always the hope (that the transmission would not make it a chain killer) but it's nice to be confirmed. I'm now at 4,500 miles and have no chain issues.


Saturday, 28 June 2008

GP800 - Fuel Consumption

I have now covered just over 2,000 miles on the GP and fuel consumption has averaged exactly 49.0 mpg. The individual spread across tankfulls has been a worst of 44.6 mpg and a best of 53.06 mpg. This exludes the first few "running in" tankfulls.

This gives a theoretical "range to tank" of pretty much 200 miles.

It started me thinking. I have a speadsheet that records distance and fuel consumption and I wondered how the GP800 would have fared if I owned it in 1977 - the time I owned my first ever bike, (also a Gilera) the RS50E "Touring".

In 1977, petrol was 78.2p per gallon (I can't remember the price of the "spash" of two stroke - there was no "autolube" on Italian 2-strokes in those days). This doesn't sound so bad until you remember that this price equals just 17.2p per litre. I have taken today's price as £1.19 per litre.

Applying these figures to my use of the GP800, I find that:
  • If I had been filling the GP800 up at 1977 prices, I would have paid only £31 to cover the 2,106 miles I have on the clock.

Or to put it another way:

  • If I had spent the same amount of money at 1977 prices, I could have travelled 13,275 miles for the £212 I have actually spent on fuel for the GP800

Makes you think, doesn't it ?

Monday, 23 June 2008

GP800 - Custom Screen Modification

Here it is, the DIY screen modification for the GP800. It stems from a suggestion from JT at Thompsons that the standard screen blade for a 125/250 Gilera Nexus might be usable as a second screen on bikes where the standard screen does not protect enough. However the Nexus screen blade is too flat for the GP800. It could work if it was carefully curved (with the aid of a hairdryer) but there did seem to be another solution. The standard screen from an MP3 looked good for the GP800 - but it also needed a degree of modification.

In order to line up properly and provide sensible mounting, the lower section complete with bolt holes needs to be removed as well as the top of the side mounting holes. Here it is with a neat(ish) curve applied where the top hole has been cut out.

JTs suggestion that rear exhaust mounts from an original Mini might make good mounts/spacers seemed like a good place to start however these are a bit big and unsightly but I guessed that Vauxhall Cavalier fuel pump mounts might do the trick (like the Mini metalastic "bobbins" but smaller).

Before I tried the Cavalier fuel pump mounts, I bought packets of every washer and grommet under the sun together with some GT Moto "Aluminium Screen Screws" (at £10 ouch). These were the really clever idea - unfortunately, they just pulled through the hole I cut in the screen under light hand pressure - they would never have survived the wind blast at motorway speeds.
After drilling my GP800’s screen and using a combination of coachbolts and grommets to create a kind of rose joint arrangement I bolted it all up and went for a spin.

Not an entirely successful operation to be honest.

Firstly, at slow speeds it squeaked and creaked - I presume I had put some stresses in one screen or the other when bolting them together. As I got up to 50, wind pressure stopped the squealing and I headed for the M1.

Now things started looking up - with the screen fully upright, the increase in frontal area stops all windlast and buffeting was definitely reduced - but......... IT'S VERY VERY VERY NOISY - IT SOUNDS LIKE YOU'RE IN A WIND TUNNEL - YOU DON'T FEEL IT BUT YOU CAN CERTAINLY HEAR IT.

I came back down the M1 with the screen at it's lowest setting - still plenty of protection from the wind but just as noisy.

Next step was to increase the separation between the two screens. I also took the opportunity to do a better job of sanding and finishing the cut edges.

The separation was achieved by using nuts as spacers and this allowed the coachbolt to be tightened on to the MP3 screen first. This allowed the screen to rest on the GP800 screen so that I could tighten it down in rotation to avoid putting any stresses in that might cause creaking.

Grommets were fitted where the bolts pass through the screens with penny washers each side to spread the load. A quick "round the block" roadtest revealed no creaking and the only problem was that despite increased spacing, the two screens just touch at he top where the GP800 screen has it's maximum curve causing a "tapping" noise and also scratching both screens. I cured that temporarily with a bit of old hose.

After about 50 miles each way on a motorway at sustained high speeds - the new solution was definitely quieter than before - although still noisier than the standard screen. It was quite gusty on the M4 and no problem at all - in fact I was probably going a bit quicker than usual so it must have been keeping the wind blast down.

However (you knew there was going to be a "however" didn't you) by the time I left the motorway and was pootling towards Northwick Park, I noticed that the squeak/creak had returned. I'm guessing that the force of the sustained high speeds had put stress into the rigid mounts. There was also slight cracking. Surprisingly, the cracks are in the MP3 screen which is mounted using original holes rather than the GP800 screen which has been drilled.

I now know why Reseach & Development is such an expensive buisness. I stopped at good old Moshi's Auto spares and bought the Vauxhall Cavalier Fuel Pump mounts (four of them at £2 each ) to give me a "flexi mount - I should have done that in the first place.

The problem of the MP3 screen touching the GP800s screen at the centre top was cured by a piece of visor rubber (like a short sticky backed car wiper blade).

I fitted the second biggest penny washers I have together with the rubber washers from a garden hose connection. The biggest washers I had were an affront to aesthetics (and lets face it the nyloc nuts I have now are hardly pretty) but we'll have to see how that effects the cracking. I've marked the extent of the cracks with a black felt pen to see if I've arrested their spread.

Finally, I cut and reshaped the sides - this may further reduce the turbulence and is certainly neater. All I need to do now is spend some time with brasso where the multiple cutting, sanding and simply removing and refitting has left me with a few scratches.

And here 'tis

Sunday, 22 June 2008

GP800 - Alternative Screen Options

The aftermarket is now starting to wake up to the GP800 and there are a number of screen options appearing. Information is still scarce and some of the manufacturers are all as bad as each other when it comes to responding to customer enquiries. There's an honourable exception for Ermax who responded very quickly.

In summary, options seem to be as follows.

  1. The official Gilera "Touring" screen -no news there yet (unless anyone knows differently and would like to let me know about price and availability)

  2. The Ermax "Aeromax" screen http://www.ermax.fr/nouveaute-GP_800_2008-153.html This is quite a nice looking bit of kit and the UK price is £73.36. This one is available in a variety of tints and is 60cm tall.

  3. The Givi "D352ST" http://www.givi.co.uk/caschi_borse_bauli_accessori.asp?CO_ID=28234 Clear only and I can't find a price anywhere. 12cm higher than the standard screen (60cm the same as the Ermax) but no wider.

  4. The Secdem - this one's a bit of a mystery. I found a reference to a GP800 screen on a Japanese site and heard that it was made by Sedcem. I've e-mailed Baglux (UK importers) but heard absolutely nothing. As their screens for BMWs are fairly well rated as an economy option, I'm expecting this one to be cheaper than the others - but again no news yet. I can't even find Secdem's website so I think they've "gone to ground" somewhere.

  5. Make your own. This came from a suggestion by JT at Thompsons and the next post will detail exactly how I did it. In essence, it's the standard screen for an MP3 fitted over the GP800's screen on rubber spacers. There was an awful lot of cutting, shaping and trial and error involved but it does work. And it will suffice until I've been able to make a proper comparison with the 4 "proper" screens listed above.